Sunday, October 31, 2010

I Like Squishy Sofa Pillows


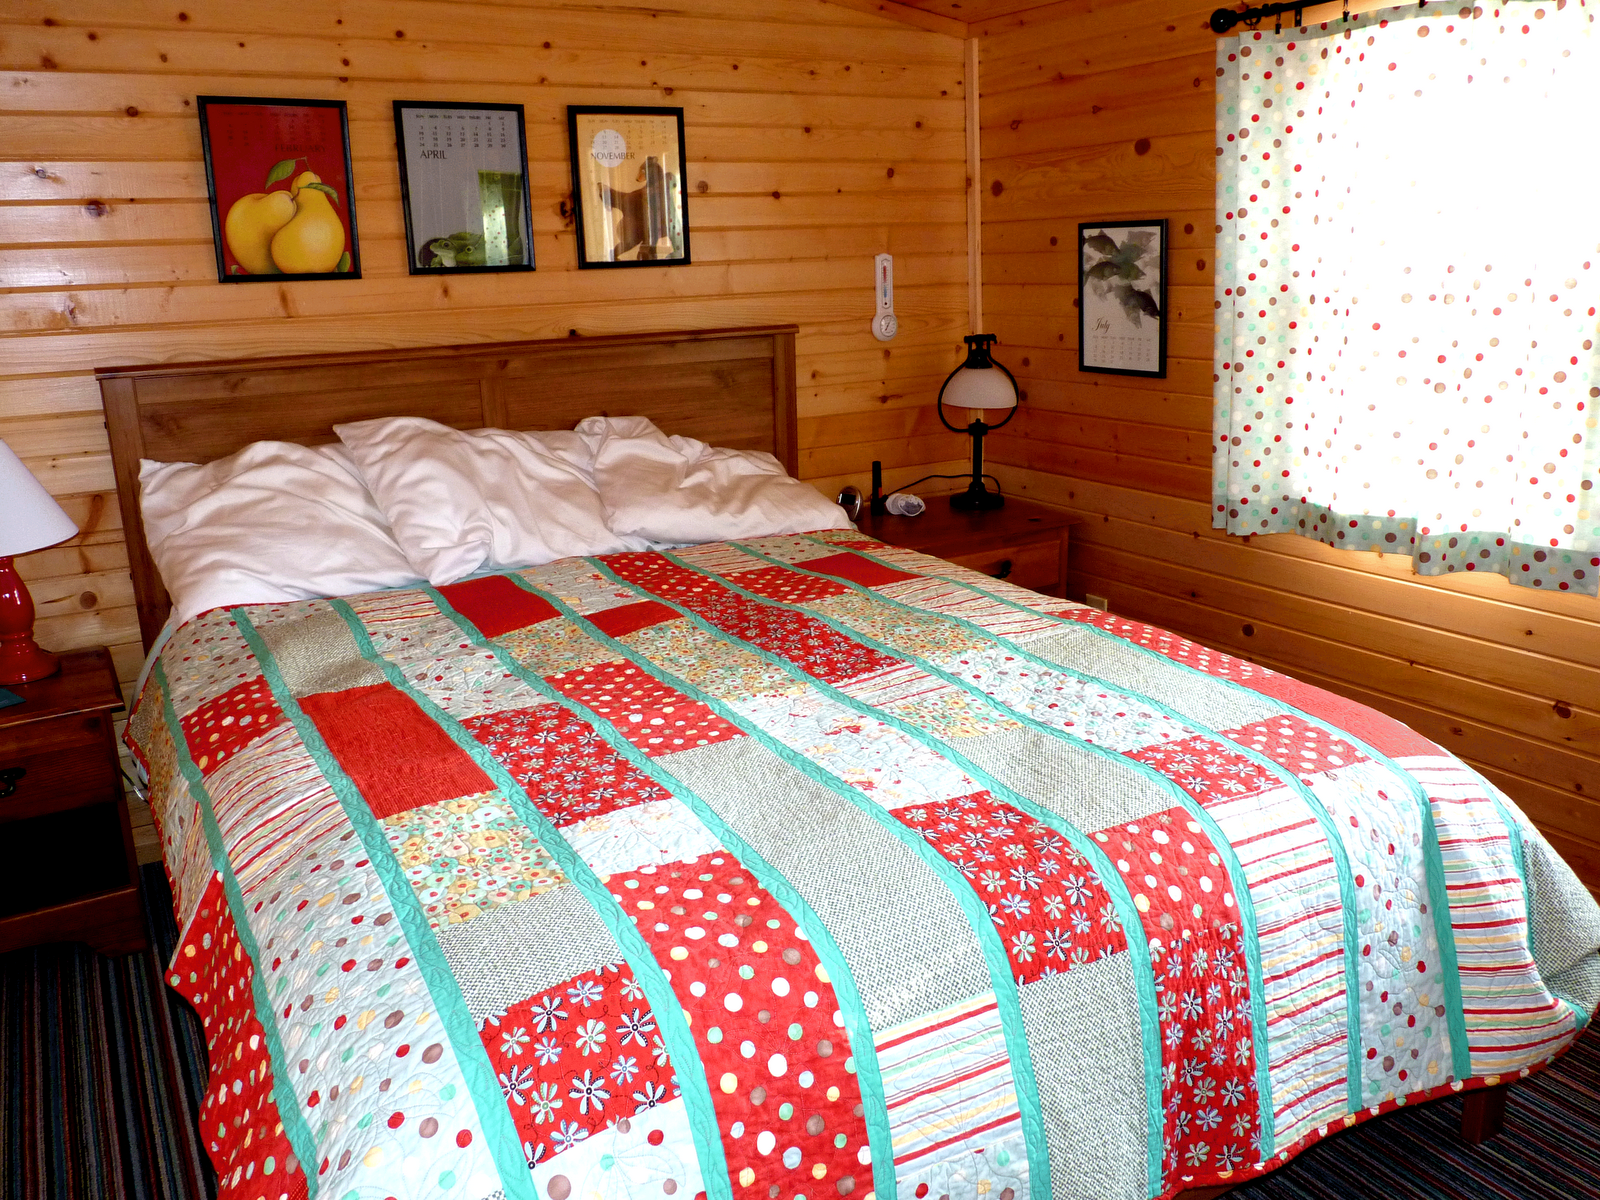
I could never understand the pillows that are sold for couches - they are usually so stiff! I guess they behave well. You put them somewhere on the couch and they stay there, all perky. Just try to rest your head on one, though, or put it behind your back. Ouch. So, most of the time I make my own pillows, and I don't stuff them completely full. I allow them to be relaxed. A trick I discovered, though, is to BUY pillows, open them up, take out most of their stuff, decorate them with embroidery or applique, and sew them back up. No leftover expensive decorator fabric! No bags of polyfill to buy. AND there is leftover stuffing for another project! What a good idea. The pillows in the picture were purchased at Shopko during a great sale. I did the described "surgery" and stitched on a few circles and some big rick rack "grass". They add a touch of color and have been used for some pretty nice cabin naps. Kind of like that Sandra lady on that cooking show (I think I have talked about her before)...semi-homemade. Jerilynn

Saturday, October 30, 2010

Cozy!


We are at the cabin doing a few things to get ready for the big digger to come on Wednesday. We are putting a door from the living room walkout level to the soon-to-be new basement level. The door is going in the corner where the stairway to the sleeping level creates a nice little storage area. That was (is) basically our only "closet" and when we unloaded it to allow for the new door, I was amazed at the stuff we have accumulated over the past 3.5 years. A good purge will happen as we put stuff back, that is for sure. After that unloading project was done, I started to look around and decided I needed to take a few pictures of the "before" and got a bit nostalgic. Even though we have only owned the cabin a short time, it has been a cozy and fun retreat for us and family and friends. The above picture is a shot of the "master bedroom". Not very big. The side wall is just to the left of the nightstand with the red lamp. I am standing just inside the door, so you can see that there isn't much room for dancing! The quilt was a made-up pattern based on a quilt I had seen somewhere and decided that I could just piece together odd sizes of rectangles and then put a long strip on a border in between. I saw an fun movie a few years back, The Life Aquatic with Steve Zissou, and loved the colors in the movie! The soundtrack is great. If you are in a mood for a quirky movie, seek this one out. Anyway, what does this have to do with the quilt? Well, the Team Zissou outfit is a pretty blue with a red hat. Love that combo. When I went to make a quilt for the cabin, I dug around until I found some fabrics that gave me that combo. You can't really tell too much from the photo, but the curtains (made lined with the method I talked about a few days ago) are light turquoise blue with dots (of course). I used some of that in the quilt. The red with the dots is leftover from the bathroom curtains at the cabin, and the stripe is from the curtains in the guest room. The pictures on the wall are framed months from the Linnea Anderson poster calendars. Do you have a hard time throwing out calendars, too? What a great source of cheap art! You also can't see that the ceiling is a bit sloped. The curtains hide a direct view to the lake. In the remodel we are keeping our bedroom where it is, but the guest room, even smaller will become part of the room, housing a small closet and a bath. Not fancy, but still Cozy! Jerilynn

Friday, October 29, 2010

I love Wool Felt!

I am almost at the point where I could be happy just working with wool felt. The colors are pretty, stitches looks great whether they are machine embroidered, machine stitched, or hand stitched. No ravely raw edges. Maybe it is a throw back to childhood craft projects. Years ago I ordered some 100% wool felt from Martha Stewart's web store. I remember it came with some patterns for Christmas stockings. For the longest time I couldn't bring myself to cut into it - it was that beautiful. Well, I got over just looking at it and then started to look around because my stash was dwindling. I found the Wool Felt Central web site and they carry all the colors, and I also discovered that Sew Complete in Eau Claire also carry quite a few of the best colors. I was back in business! Even though the felt I am buying now is part wool, part rayon, it is still very fun to work with. The above little quilt I made for a quilt challenge. The theme was "Baby It's Cold Outside". It is made with appliqued squares sewn on with the blanket stitch in black thread. The snowflakes were embroidered on my embroidery machine. Big red rick rack is tucked between the two backgrounds (rick rack is also a favorite of mine - so cute!). It was a charity fund raiser and the little quilt went for a good amount of money! I was pleased and also pleased that I won viewer's choice. I guess maybe there are others out there that like felt and rick rack. I am working on a new wool felt project, and it is turning out great. I can't really show you a picture yet, because it may become published and I don't want to ruin the surprise! Just know that I am having fun with my big pile-o-felt and lots of colors of King Tut Superior Thread. I promise you will get to see the results soon. Jerilynn

Thursday, October 28, 2010

Folkart Clothesline Tote Class Stars!


Look at those happy faces! This was the second half of the Folkart Clothesline Tote class. What a great group of talented women! I think I learned more from them and their ideas and suggestions than they learned from me. I loved how each tote turned out so differently and I loved all the different colors...as I have said before, my totes seem to look the same. I guess we are all drawn to our favorites. All of the ladies said they were going to make another tote after this one - I sure hope they send me a picture of them. I did buy some fabrics that were unlike I usually pick out to make a new tote, but I didn't get it done in time for the class. We have had quite a couple of weeks of family health issues with parents and that has taken priority. Knock on wood, but tomorrow looks pretty clear. Do you think I may be able to do some sewing machine therapy? I sure hope so. But, I had such a good time with the above ladies tonight and during the first class, that I will go to bed with a happy heart. Thank you to them! Jerilynn

Wednesday, October 27, 2010

Photoshop Elements Technique

This is our cabin "before". We are still waiting to start the digging for the basement and new foundation. We are trying to get a variance ruling...hopefully that will go through next week and hopefully the ground doesn't get covered with snow. The picture is a real picture of our cabin that I took into Photoshop Elements and used this tutorial http://www.photoshopcreativeelements.com/viewtopic.php?f=8&t=2877

I have also done this with my daughter kayaking on the lake, and the result is quite fun. I printed this image out on heavy watercolor paper and framed it and have been asked if I drew the picture. This technique would make a good Christmas gift for someone, don't you think? Jerilynn


Tuesday, October 26, 2010

Penny Rug Sock


A request was sent out last fall by my oldest son and his wife for some Christmas stockings to hang on their new mantle at their new house. Of course I immediately thought "circles"! I made this stocking, then decided it might be too folkart-primitive for their taste. So, I made two other stockings out of red wool felt with cream circles stitched on with a blanket stitch, and their initials embroidered on the cuff. I sent this one along with the other stockings, too. I thought this might be cute anyway with a pine sprig in it on a door somewhere. I forgot to ask last year if it got used. Once you give something to someone, they can do whatever they want with it, but in the case of this stocking, if it isn't going to be used I may be a pushy mom/mil and ask for it back. Or, I could just keep quiet and make a new one for me. Yep. I think that is what I will do. Golden rule. Jerilynn

Monday, October 25, 2010

Zipper Ruffle Trimmed Big Bottom Bonnie Bag


The ruffle on the Big Bottom Bonnie Bag I made today didn't get too ruffled. I used a pretty thick metal zipper and two layers of fabric. When I stitched two lines of straight stitches to gather, I only got a wave look. I put a section of the ruffle on one side of the outside of the bag, and a zipped double pocket on the other. I lined it in a swirly yellow fabric (the lighting on these pictures is not to good) that looks good with the outside fabric. I may add a beaded zipper pull to the zipper tabs. I think I have some gold-colored lobster claw closures. We hung the curtains from yesterday and they look sharp. I forgot to bring my camera over to their house so you will just have to take me word for it. Jerilynn

Sunday, October 24, 2010

Lined Curtains with Dotty Fabric and Circle Grommets


Today's sewing fun was some lined curtains for my son and daughter-in-law's dining room. They recently painted the dining room grey with a focal wall a deep blue. Very pretty. The lone window had blinds, but needed a little fun. A week ago we went to Mill End Textiles armed with a 60% off coupon and careful measurements. DIL spotted (no pun intended!) this fabric right away and I agreed it was perfect! We decided to line them to give them more body - plus it just makes any fabric look great. To finish them off, we decided to install big black grommets. I love making lined panels. They seem even easier than not lining them, because the side seams are sewn to the lining fabric. Since the lining fabric is narrower than the main fabric, the sides roll to the back and it looks very professional. I found a good tutorial for this method at http://www.alternative-windows.com/lined-curtains.htm . I didn't put in the drapery tape they call for, and I increased the top hem from a double one inch to a double 4 inches to allow for a nice hem to place the grommets. Unfortunately, after we tried to put in the first grommet, we discovered that the 6 layers of fabric (main fabric and lining and two layers of hem) were too much to handle closing the circle. So, I unsewed the stitching, trimmed off one of the hem foldovers, stitched the top hem down again, and everything worked. If you haven't tried those plastic grommets that are out in the market now, you should! They have the big ones that I used here that will look good on the fat black curtain rod, but there are littler ones, too. I have used them in handbag patterns, too. The curtain rod was installed close to the ceiling and the drapes come to the floor. I think they will be really fun. I have just a little bit of fabric left and I might use a piece as a photo mat for a black and white photo. The room will look great just in time for youngest grandson's first birthday party. Jerilynn

Saturday, October 23, 2010

Bibelot Vist


My sister and I went to the Bibelot shop on Grand Ave. in St. Paul, MN last Saturday. Love that store...clothes, shoes, jewelry, gifts, kids, decs, cooking stuff...you name it. Stuff can be pricey, but the ideas are wonderful! I love to go there before I head down the street to the Bead Monkey bead store. I try hard to concentrate on a necklace or such that I would like to interpret with my own beading skills, but by the time I leave the store, and drive 6 blocks, the idea is gone. Anyway, in their clothing section they had a gorgeous jacket, steely blue, wool, I think. the front was trimmed with a wavy ruffle in a satiny fabric. The whole jacket, ruffle, sleeve, bottom front and back, was "piped" with zipper teeth. There was also a big removable flower that was the same steely blue wool with zipper teeth trim. The price tag was shocking and I was super tempted because I had a 20% off coupon (loooove coupons). But, when I tried it on for my sister she said it was too froo-froo for me. Guess sometone a bit taller and thinner might be able to carry it off. Anyway, I just can't stop thinking about how to take this idea and use it in another way. In the meantime, I was checking my etsy store (sales have not been too brisk) and on the front page they show various artists' things, and there was a make-up bag that had a ruffle down the front that caught my eye. See it at http://www.etsy.com/listing/59662245/girly-girl-ruffles-cosmetic-bag-makeup. So then I tried to find a picture somewhere of the jacket, but only found a handbag that had zipper teeth trim . This isn't the cutest bag in the world, but I bet you see where I am going. A Big Bottom Bonnie Bag with a zipper teeth trimmed ruffle! I suppose that if I can find a steely blue fabric I can recreate the feeling of the jacket with coin left in my pocket. Jerilynn

Thursday, October 21, 2010

Where Did I Put That Needle?


Well, if you had a Needle Keeper, you would know where your needles are. I designed this Needle Keeper to be an in-the-hoop project for embroidery machines. It is hard to see from the top photo, but inside this cute little fold-up is a place to not only put your hand sewing needles and some straight pins, but also different kinds of machine needles. The little words that you can't read are the types of needles I use most and the numbers under the names correspond to the sizes of the types. So, a slightly used topstitch needle can be put in this case for the next time I need a needle of that type. To keep track of what kind of needle I have in my machine, I can place a straight pin in the type section and in the correct number position. Clear as Mud? The outside of the case has a little redwork design that was built into the Bernina V6 Software. A little round Velcro holds things together. A fun and fast little gift for someone or for yourself. The handbag idea I talked about yesterday is working good so far, but I don't want to spoil the surprise by just showing you a part of it. I am using the decorative stitches on my machine. How many of you bought a new sewing machine with lots of fun stitches? You went right home and sewed them out on a scrap of fabric, didn't you? Then, you went on to sew a bunch of things...mostly with the straight stitch and some practical stitches. Me, too. I would longingly look at all that cuteness and sew a few out now and then, but didn't have a real big project to use them for. Well, this new project I am working on uses lots of those great designs. I am using red wool felt (are you surprised at that?) and using a cream colored cotton thread. Fun. Jerilynn


Wednesday, October 20, 2010

Funky Chickens


These funky chickens march across a white dish towel. I digitized them in the Bernina 6 software and should have sorted the colors before I stitched them on the towel. I had a ton of jump stitches to cut - you can still see a little blue thread in the upper left hand corner. I know better, but I was so excited to see how cute they would turn out that I didn't take the extra steps needed to make a good sew-out. It seems there is a growing fascination with all things redwork - and I include the above design in that definition even though it is multi colors. To me, redwork embroidery is simply a broad description of outline designs. I don't think these chicks would be as cute filled in with stitches. I have a new idea for a felt handbag, and I envision redwork type stitches and maybe I can even make it look a little Scandinavian. I would love to use cream stitches on red wool, but it might look too Christmassy. Maybe I will stitch out a few squares tomorrow to see if my good idea actually is one. Birthday post from yesterday update: Wynne didn't comment. I think she was too busy having a great birthday to check blogs. I will give her a few more days before they are up for grabs! Jerilynn

Tuesday, October 19, 2010

What is Going On Here????


Hey! You are saying to yourself...what gives? Didn't I just see leaf coasters on a Jerisew(s) post? Well, sharp-eyed readers, you sure did! Wynne has a birthday tomorrow (Wednesday) and she commented on the leaf coaster blog that she like those leaf ones quite a bit. Sooo, I am not only making her a birthday gift that I know she will like, but I am rewarding her for being so kind to a) read the blog, and b) post a comment! But, and here is where it gets interesting.....unless she comments on THIS blog, the coasters will be sent to another reader! But only readers named Wynne, and only those with a birthday tomorrow. I know, that narrows the field down, but there just might be someone else out there that fits this description. Also, you ask, why are there an odd number of coasters - sets usually are even numbered. Well, all of the colors insisted upon being included in the birthday give-away. You know how bossy colors can be! Other news: on the cabin project. Now we find out that the studio is not in code because it is going to be built on a current cabin whose position is not in code but has been grandfathered in. We can apply for a variance and that should take two weeks. My husband and I have decided, however, not to get too upset over any inevitable challenges that will happen with this project. We have decided to enjoy the process and deal creatively with problems as they appear. Sounds good in theory, right? Jerilynn

Monday, October 18, 2010

Strange Baby Hat


If you go to Purlbee.com and look under a tutorial for cashmere hats for mom, dad, and baby, you will see a family with hats on and the baby isn't smiling. That should have been my first clue. If you look at the end of the whole tutorial, and the whole family is laughing at how silly the baby hat is, that should have been the second clue. Well, I guess I needed to find out for myself. I finished the hat, and, yes, I am showing you a picture, and I can only imagine how it is going to look on a baby's head! Maybe smaller needles, maybe thinner yarn - I don't know if anything would have helped. Maybe if the youngest grandson takes up snowmobiling he can wear this over the helmet. My next to youngest grandson likes to motor bike...maybe he can use it. Or, maybe it just could be donated to a drive for warm hats for kids, although that isn't very nice to donate a silly hat. It does look warm, and it does have a built-in neck warmer. I did get most of my sewing area picked up today. Here's the "before" shot, but I will wait for a good "after" shot. Somehow even a bit more organized it still looks cluttered. I guess I need to hire a stager to stage the sewing room so that my blog readers (all three of you!) will be impressed with the neatness. For now, though, I am going to start another small knitting project because I have a cold and I am too tired to do much else. Sniff. Jerilynn

Sunday, October 17, 2010

Sewing Room Didn't Get Organized!


I bet you are really shocked, right? Went to lunch with sweet DIL and grandson, bought a new power cord for my laptop (WHY are they so expensive??? Because we have no other option???), bought some curtain fabric for DIL's dining room (I love it - dots!), and came home to clean a bit and wash towels/sheets from the last week's family visit. While outside I noticed my pumpkins were looking a little tilty...tried to pick them up by the stem and realized it was pretty much a blob of orange goo at this point. Now, anyone that knows me knows I have a "thing" about pumpkin goo...my poor children had to have a stand-in mom help them with carving. Sooo, I did my best big-girl impersonation and used a snow shovel to get rid of the mess. No more cute outdoor decorations. But, once I came inside and cleaned a little, I decided to add more autumn color inside. I put out these fall leaf coasters, cute and practical. These, unlike most of the other coasters I make are not machine embroidered - just machine stitched. The top layer is outlined with a blanket stitch, and then a triple stitch defines the veins. Tomorrow is another day. If I am brave enough I may take before and after pictures. Jerilynn

Saturday, October 16, 2010

Time to Knit


Knitting patterns always seem a bit more interesting this time of the year. The little hat I have almost done for my youngest grandson is in the book from which I made these two sweaters. A young friend of mine had twin sons and I thought I would try to make these that had a design chart. Other than having multiple threads to drop and pick up and wind around each other so I didn't get the dreaded holes in my work, I think it was pretty easy and fun. She sent me a picture with the little guys in the sweaters and if I can find it, I will post it so that you can see how cute they look in them! There is a moebius scarf pattern that I want to knit for myself, but I think I best get the hat done first. Have you seen those mobius scarves? They are cowl-like but are twisted a little and drape beautifully. Maybe because the weather is starting to chill a little, but those neck things are looking pretty cute. Faster than a sweater, even a little one. Especially faster than two little ones. Tomorrow is the organize-the-sewing-room-day! I can't wait to see what I find! Jerilynn

Friday, October 15, 2010

So, What Did You Create Today, Jeri?


A rock pile! Yep, this was what I created. We had a rock border by the cabin that needed to be relocated before the excavator people came so we came up to the cabin to haul the rock to their temp location. It wa a pretty good plan: back the Honda CRV close to the cabin, load up the big rocks and then drive it up to the garage and make a pile until the construction is done. Work gloves: check. Cute autumn sweatshirt: check. Ibuprofen: check. All went well for the loading...but...the unloading didn't go as smoothly. Slipped on the pile of leaves as DH was backing up the car to the unloading area. I cried out loudly so that he would miss my head! He helped me up, brushed me off and told me not to go on that side of the car again! Went to the back of the car to unload the rocks and ran my leg smack into the trailer hitch! Ouch. At that point he is wondering why he let me "help". Happy to report that the rest of the project went just fine. We have little rocks to haul tomorrow, and then we are done. I realize that this picture isn't as colorful as previous posts, but I am pretty pleased with my efforts today and with the fact that I am still able to post a post. Tomorrow I plan to take several shots inside and out of the "before" so that when we are done I can be amazed at the transformation. I brought some knitting along with me, so maybe that might be tomorrow's picture. Dunno. Jerilynn

Thursday, October 14, 2010

In a Color Rut?


I taught the Folkart Clothesline Bag tonight to a good group of 9 ladies. A few I knew and was happy to see their faces and the rest I just met tonight and will be happy to see their faces at the second class in two weeks. I brought in a few of the bags I made to show them how different the shapes are and to show them some color choices. Only, when the totes got all together I realized that they all more or less looked like each other! Slight variations on the theme, but nonetheless - alike. I told the students then and there that by the next class I would make a new bag and make one NOT out of my usual color choices. It will be really hard not to do any red, and I always like the touches of black, oh, and I like the greens and blues, too. Well, I will just have to come up with something that does not look like it belongs with the others. One lady had previously started to make one of the other popular clothesline bags and gave up. Another had made the one where you wrap strips around the cord and then zig-zag together. Both of those ladies were happy to learn this way of making a bag. All the students seemed to love this technique and talked about the next one they were going to make. They left with smiles (well, I also made 7 layer bars for them to munch on, so maybe that is why they were smiling). Usually I have taught this in one five hour class, and this time it is a two-parter. It will be interesting to see if anyone makes another one before the second class. In that class we will work on the lining, pockets, and handles. Might have to make some cookies. Tomorrow we go to the cabin and move the rock borders before the digger people come. No pain, no gain. Jerilynn

Wednesday, October 13, 2010

Cotton Theory Rug


My neighbor at the cabin, Betty, is a certified Cotton Theory Teacher and I took a class at her

house to make a rug. I picked out some bright fabrics (of course!) and some striped fabrics that would give an overall look of a rag rug. You can't really tell from the photo, but the white-looking fabric has a black stripe and that really makes it look like the string running through a rug from a loom. Not really up on my weaving terms, oops. The fun thing about Cotton Theory stuff is that they are reversible, so when I bloop something on the rug, I can turn it over for more floor time before hitting the wash. It is made just from cotton, with a cotton blend batting. It washes beautifully. How do you like the floor that it is on? Well, say good-bye to that floor! Our old fridge sprung a leak sometime last summer while we were at the cabin. The floor in a wide area around the accident zone has the grain of the wood very raised. Not so comfy on bare feet. Of course the floor is old enough that it can't be repaired, so we need to tear up all the wood in the kitchen, breakfast room, dining room, and entry. Fun! We decided to wait until after my sister is gone (she is here for a month) because the kitchen will be out of order for a couple of days. It should look nice and new by the time the holidays roll around. The fridge? Had to replace it...boy, those things aren't cheap! The rug, however, did not get ruined at all - still the star of the kitchen! Happy sewing. Jerilynn

Tuesday, October 12, 2010

Quick Card Case


My nephew and his wife and their three daughters (my great-nieces, and I agree!) are here visiting from Arizona. The middle girl is 10 and is just the perfect age to learn to sew. Last night they saw the card case my daughter made, and uses to stuff all her cards in, and thought it was really cute and clever. So, this morning, I thought that would be a great project to start with. It is similar to the little case that has been around for a while, but my version is simplified and takes just about 10 to 15 minutes to do, with no raw edges showing. I let my niece pick out five fabrics, one for the outer side, one for the inside, and three fabrics for pockets. I did the rotary cutting - those round razor blades are sharp! She did the pressing, the pinning, and the stitching. She even sewed on the Velcro in just the right spot! I was very proud of her and she was pretty proud, too. Now, though, the other two sisters want one, and so does the mom...so, I think we have some more sewing to do before they leave on Friday. I am also thinking of having her try the Origami bag that I have seen on the web. I am sure there are lots of fun quick projects for her to try. I should put my pattern for the Quick Card Case up on my Etsy site in case those of you in Blogland would like to try it. Let me know if there is any interest. I might even get out the new toy I bought myself...it is the heat thing that you can put crystals on clothing with. Hmmm, not very good sentence construction. Anyway, I might be the only adult sewer in the world that hasn't decorated with hot crystals yet. Never too old to learn. Jerilynn

Monday, October 11, 2010

Somewhere Over the Rainbow


The quilt I am showing today is officially called the Color Wheel Quilt. Joelle Hoverson of Purlsoho fame has it in her book Last Minute Patchwork and Quilted Gifts. The one she made is a square quilt with one complete color wheel circle. My daughter saw the picture in the book and wanted that "look", only in queen size for her bed. So, I just made two circles, kept one whole, and cut the other in half and then one half in quarters. It goes together quite quickly - the white is a whole cloth, and the pieced arcs are appliqued on top. I turned under the inside seam allowance and the outside, then used a tiny zig-zag to sew them down. Jennifer Bauer was the machine quilter, and quilted it in an uneven grid - we thought it would be a nice counter design to the circles. The quilt was a huge hit - it is on a bed that my husband built for my daughter, and the bed is painted a wonderful turquoise color. A reddish nightstand from Ikea is close by. Really cute. So even though it is not a rainbow quilt, I am reminded of one when I see it. My favorite rendition of the classic Judy Garland song is by Israel Kamakawiwo'ole with the runner up being the version by Eva Cassidy. If you haven't heard those, it is worth your time to look them up and listen. Sweet dreams! Jerilynn

Sunday, October 10, 2010

Turkeys

I guess since I have already jumped to a Christmas post, I may as well jump to turkeys! This embroidery was done for the other grandma of our youngest grandson. The little handprint is his, the bigger handprint belongs to his slightly older cousin. I turned the two little prints into turkeys using the free drawing tool in the software for the red stuff on their heads (I don't know the proper name for those - combs? waddles? I should look that up.) I used the heart in the Corel draw of the software for the feet. This got stitched onto a kitchen towel and presented to the happy grandma for her birthday. I have also made embroideries for new parents from the first hospital footprints. It doesn't matter if they aren't perfect outlines. In the eyes of a new parent, those little prints ARE just perfect! I really appreciate you stopping by! Jerilynn

Saturday, October 9, 2010

Question


So, a blog reader of mine questioned what I am...am I a blog about sewing/quilting/creating, or am I a reporting what is happening in my life blog. I couldn't answer that question becasuse my sewing, etc. has always just been a part of what I do and what Iam. Sooooo, what should I do since I am a new blogger person - do I just let you know what I make or do I let you know what is going on in the background? Anyway, I am happy to hear that you like the tee shirt quilts. I hope I my very brief tutorial ( ha - I love it that I can think that the brief explanation was a TUTORIAL!) Leave a comment if you want a more detailed explanation, but, seriously, they are super simple to do. One thing I forgot to mention is that I don't line up the tee shirt images like little soldiers in a row - I turn them every-which-way - no up or down. Thanks for reading. BTW, tonight I went to a wedding where my baby boy was the best man, and I agree. Jerilynn

Tee Shirt Quilt


This is a picture of just one of the many tee shirt quilts (or tee shirt blankets as I like to call them) that I have made. Put the shirt on the cutting board, smooth out, plop down your big square rotary ruler, cut around ruler, arrange in pleasing order, serge together in rows, then serge those rows together (no iron-on interfacing used - serger's differential feed will take care of any waviness), plop the tee layer on top of a soft fleecy blanket from the store, meander quilt all over the layers (no batting), trim blanket an inch from all side, bring to front, tuck under and decorative stitch or zig-zag stitch in place. VERY fast, very easy. People LOVE these because it is made from their memories and is very soft and cuddly. This is not a hang-on-the wall quilt. It is an oh-my-goodness-my child-just-graduated-from-high-school-and-just-yesterday-she-was-12-and-now-I-need-to-make-something-fast quilt. This is shown on a bed, but it is usually on a couch as a throw. Hope you are enjoying the warm weather if you are near northern WI. See you tomorrow! Jerilynn

Thursday, October 7, 2010

Kaboom!


What an exciting day! We had to have two trees removed on our property to make way for the addition of the cabin. We still have lots of trees and plenty of leaves to rake, but these two trees were not only in the way, but had some pretty hefty dead limbs that were a hazard. It was so fun/scary to watch the tree crew plan the cut. Our little three year old neighbor boy (an Opie double complete with red hair that sticks up and freckles...adorable!) had a front seat to see all the action. It was so fortunate that today was his day off from day care! The other next door neighbor had two trees removed also, one of which was between our cabin and their cabin. It was a very, very tall pine tree that had become a high rise condo for woodpeckers. Lots and lots of holes had made the tree somewhat unstable, and it had to come down. There was only a narrow opening for that huge tree to land. We had to get out of the cabin and go waaaay over to the opposite side. What a show! The cut and landing went perfectly! Every tree that came down today, though, made a loud "kaboom"! In the midst of all this, a neighbor friend and I decided to make apple pies....and our contractor came to tell us the set-back had changed and we needed to redesign the addition...so busy! A vendor I used to work with would call me and tell me he had an "opportunity" for me....to be creative. That meant that a shoe I had ordered for a spot in the catalog had dropped from their line and I would have to scramble to fill the spot before press time. Well, Carl and I now have an "opportunity" to be creative and re-configure the addition, before the diggers come next week to dig the hole! I just hope the studio doesn't get cut - yikes! Picture of the day was taken on the back deck that has to come off and re-used once the building is done. It is called Stripes and Squares and the pattern is by Aardvark Quits. You can't see from the picture, but it is quilted in swirly circles by Jennifer Bauer, a wonderfully talented machine quilter. This quilt is on the couch at the cabin and is perfect for chilly times. It is strip-pieced and goes together quite easily because the bias edges are forgiving for matching. The pies are done, the tree guys went home for the day, and Carl is at the counter with paper that has little squares. I am sure an even better design is just moments away. Jerilynn

Wednesday, October 6, 2010

Christmas?


Today is one of the most beautiful autumn days you will ever see. We are at our cabin, putting some of the outdoor stuff in the Fish House Hotel (ask me about the name sometime!) and getting the boats out. The color here is just breathtaking. You would think I could show some shots of that, but for some very odd reason I woke up this morning in a Christmas frame of mind. My embroidery machine is in the shop for repairs, so maybe I am having anxiety that I won't be able to get everything done I want to get done for the holidays. Maybe this good weather just has put me in a good mood and I am happily looking forward to family fun. Dunno. I do know that I like these shaped holiday coasters! Again I used the Bernina V6 software to design the simple shapes. This time, though, instead of hooping two layers of the wool felt of the same color, the bottom layer was black. After stitching out the designs I first cut close to the stitches on the top, colored felt, and then cut the background, black felt about 1/8 inch away. The black frames the colors nicely. I bet other color combinations would work well, too. Maybe I will play around with more designs today. Hmmm, I could make some with not only the background sticking out all around, but I could make something with cut-outs so the background shows through now and then in the main part of the coaster. Cute! I should, however, get outside and help the spousal unit and drink in the wonderful fall sunshine. Crunch, crunch (that is the sound of me working in the yard in the leaves.) Jerilynn

Tuesday, October 5, 2010

I Might Put Out Some Autumn Decorations This Year


Years ago, I would decorate for every season - didn't we all do that? I used to pretend I did it for the kids, but I don't think they even noticed that when they got home from school a different "theme" had appeared. Gradually the boxes of stored items labeled "Autumn", "Halloween", "Christmas", "Snowmen", etc., have turned into a couple of boxes that simply say "Decs". Inside you will find just the favorites that I still can't bear to part with. Maybe they are things given to me by friends that are no longer with us, or maybe some of them are grade school art from one of the kids. Funny how a song, or a scent, or a seasonal decoration can take you right back to that point in time. I think I used to have a whole box of "Sunflower" items. Our wrap-a-round screened porch at our old house was usually where I put the sunflower stuff. It was also the storage for all the yard toys and the gathering spot for the neighborhood adults. Good times and good memories. Of course I had to design a sunflower coaster, complete with swirly seeds. For some reason our youngest grandson, nearly a year old, loves to grab this coaster off the table near the Red Chair and squish it around in his hand and give it a taste. I think he can identify the beverages it has held. This design would be cute on a tote, or, with a little tweaking, would be a great applique. Another sunny fall day, better get out and walk before it gets too slippery with snow! Jerilynn

Monday, October 4, 2010

Sick of Circles Yet?


This table runner is loosely based on the traditional Bulls Eye quilt pattern. I free-form cut circles in four diameters. I appliqued the smallest circles on the next bigger size, using black thread and a blanket stitch. I trimmed the back of the bottom circle carefully cutting inside the stitching (this reduces bulk). I appliqued this resulting double circle on the next bigger size, again using a blanket stitch and again trimming the back layer of fabric inside the stitching. This was sewn on the biggest and final circle...blanket stitch, trim...you get the drill. The resulting circular set was stitched to a black square...blanket stitch, trim.... The fun part comes when you get a bunch of these made. I kept my color palette to primary brights, but I used many different prints in each color. This gave a very scrappy look, which I was going for. Anyway, once you have the number of squares you want for your runner, cut each square in fourths. Because the circles are hand cut, and because when I sewed the circles on top of each other, I wasn't too concerned with exactness, they were all a bit "off". When I shuffled the colors around and sewed fourths together to make a whole block again, the circles were even more delightfully wonky. Sew those squares together, and you have a top ready to quilt. A hint that I would give would be to try to start and stop your blanket stitch in the same area for all circles. When you go to sew the final circles on to the black squares, line up the "starts and stops" somewhere that you are going to cut into anyway. No worries about securing those starts and stops of the blanket stitches because now that is all taken care of in the quarter inch seam allowance. Clear as mud, right? Don't know what I am going to show you tomorrow. Today we spent quite a while looking at bathroom fixtures for the new cabin addition. My head is spinning with possibilities! I think we have most everything decided upon. I am most excited about the bathtub that is going in the bathroom on the studio floor (oh, my gosh, did I just say "studio floor" like it was the most natural thing in the world???!!). I felt like Goldilocks when I tried out the fit of the tub...it was "just right!" Now, how can I sew enough stuff to pay for this?? See you tomorrow! Jerilynn

Sunday, October 3, 2010

She Likes Circles, Dots and Swirls


Yep, put a dot on it and it will probably end up in my shopping basket. If I were a raccoon I wouldn't be tempted by shiny stuff but I would be picking up anything that I found that was circular. Can't understand why red isn't everyone's favorite color and why anyone wouldn't like a dot or two in their life. You have already seen the Penny Rug Table Runner and the Penny Rug Handbag. Well, today's photo is the Big Bottom Bonnie Bag made out of selvages. I have seen quilts and other bags made out of sewn together selvages and, of course, what really caught my eye was the whole dots of color that appear on the edges. How clever to post what color is used in the printing of the fabric. I wonder who thought of that idea? I have seen some selvages zig-zagged together, and some stitched on top of a base fabric, such as a muslin. I just straight-stitched mine together because I knew I was going to iron on a fusible fleece to the back for the Big Bottom Bonnie Bag construction. This bag not only has the outside zippered pocket but I had a little piece of the fun selvage fabric left over so I made an additional little pocket on the pocket. For extra treasures, I suppose. I love the lining fabric I used, of course. Red and dots. What could be more perfect? Today is a beautiful day. Trees are having their last party before the winter snooze fest and they show up quite well against the bright blue sky. Pork steak and dumplings and homemade applesauce on the menu. mmmm Next week's weather looks good, too. More circles tomorrow...Jerilynn

Saturday, October 2, 2010

Bodum (R) and My Red Chair


Good Morning! We managed to get on an earlier flight in Las Vegas, and, even with the waiting-on-the-runway delays with that flight, made it back home almost before our scheduled flight was to take off. After a quick stop at the Castle, we were home! I am now in my favorite red chair, drinking the first cup of coffee that is in my favorite Bodum(R) mug. Bodum glasses are so fun - double layers of glass keep things hot and keep things cold. I like their simple modern shapes, too. Nothing seems to be too new around here. Even the pile-o-mail wasn't too large or surprising. There is a darling little neighbor girl who was passing around a flyer to walk dogs to earn enough money to buy a bike. We don't have a dog, but her flyer was so cute I asked her if she would bring in our mail while we were gone now and then. The business relationship was sealed and she has been helping us all summer and now even into the fall. She does a wonderful job. Sewing Club is today at my local sewing machine dealer. I wasn't going to be able to go because we were originally going to be home too late and I anticipated on being very tired. So, I think I just may get to go! Even though my brain is buzzing with new knowledge and ideas, sewing is like ice cream - there is always room for more to just ooze on in. What else is on the list for today? Unpack, organize the sewing room a bit, and start making a project plan. Most of what I bought Out West is arriving by post early next week, but I did carry a few things back. I will show you pictures of what I do. Have a good weekend, Jerilynn

Friday, October 1, 2010

Cabin Frame of Mind

Helooo! We are still in Vegas for a couple more hours, but I am looking forward to being back in Northern Wisconsin. The people watching has been great - you sure see most everything here! We had a huge room at The Mirage - all of our family could have joined us! Our flight is very late, so tomorrow will be a lazy day, fer sure. Excited about the cabin addition, so I thought I would show you some of the coasters I designed - these happen to be cabin/fishing related. I love simple digitizing on the Bernina V6. I didn't bring the security device with me on this trip and I am looking forward, also, to making some new designs when I get home. I should try some Vegas ideas! You can see more of my coasters on my etsy shop, jerisew.etsy.com. My poor family has been overloaded with coasters of many designs and shapes but they are pretty good sports about it. We are going to walk around a bit before we pack up. I want to walk down to the Bellagio to see what the display is at the Conservatory. We might even get to see a water show if the timing is right! Happy Friday, Jerilynn