Tuesday, August 30, 2011

New Jewelry Technique


I forgot to mention in the last post that these old hands also are pretty good at making jewelry! I found this new stuff (well, it was actually my sister that told me about it): UTEE - Ultra Thick Embosses Enamel. I took a heart shaped tray, arranged several sewing themed charms in the tray (I clipped most of the rings off the tops) and poured the crystals of the UTEE all over the top. I placed the tray on a cookie sheet in a 340 degree oven for about 5 minutes until the crystals melted into the clear enamel. I added a bit more and baked it again to get the coverage I wanted. I think I baked it a bit too long because there is a bit of a yellowish cast. But, it is very minor and I will take it out sooner next time. I would also place it on foil so I didn't wreck a cookie sheet. Maybe that quick release foil would work good. I am anxious to try more ideas. I think this could be fun!!! Jerilynn

Monday, August 29, 2011

She Ain't No Hand Model!


I have always been a little self conscious about my hands. They were old before the rest of my face/body caught up to them. When I was a shoe buyer, I discovered that my feet were the sample size and had many shoes given to my by vendors. Liked my feet and also the vast collection of cute shoes. My hands, however, were never cute. Sun damage didn't help. The other day I was sewing something that needed a little help to get things to line up well and I noticed that those good-old-German-stock-farm-hands were doing a pretty good job at get things smoothed out and lined up. So, I took another look at my hands and started to think about all the things they were able to do. Sewing, both hand and machine sewing. Knitting - good, consistent knitting. Crochet. Painting (watercolor). Cooking....grandma foods, of course - cream chicken over biscuits, apple pie, roasts. Fishing - threading a worm on the hook and carefully taking the hook out of the fish's mouth so they could live to tell their bigger brothers to watch out! Card playing, applauding great plays and music. Soothing many cranky babies. Folding fitted sheets into a decent square. I think I haven't been appreciative enough. The thumbs are starting to warp a bit, arthritis, I guess. My nails have developed quirky lines. I avoid bright polish. I am thankful, however, for the talent and the willingness to play along. I will not publish other pictures of old body parts. Promise. Jerilynn

Friday, August 26, 2011

Do Overs


I still had some fabric from previous cabin curtains and a previous cabin dustruffle (yuck) that I wanted to put to good use. Something about ripping old things apart and giving them a new chance is extremely satisfying, isn't it? Wouldn't we all like the opportunity to reinvent ourselves every few years? After making the box spring cover (refuse to call it a dustruffle) for the twin bed in the studio, I thought I would use more of the fabric to make some pillow cases to plop against the wall. That is another instant gratification project...pillow cases are so fast to whip together. Lots of different tutorials out there on the internet - I like the one where the seams are French seams so there are no unfinished edges anywhere. I used the fabric from our old bedroom curtains for the main body of the case, the stripe from the old guest bedroom dustruffle, and the accent trim is a new red fabric. I didn't have enough fabric left over for a third pillow cover, so I had to dig around for something else. I found two towels waiting for cute embroideries or appliques that were good choices. One side is a light turquoise dot and the other side is a red with cream stripes. I plopped them together, topstitched the sides and made five buttonholes to fit five vintage red buttons. Easy to open and use the pillow for guests. The pictures aren't great, but better than the others lately. I found the battery! All I had to do was pray to St. Anthony: St. Anthony, St. Anthony....please come around. Something is lost that must be found. Works most all the time. Jerilynn P.S. Top picture is old master bedroom at cabin. Note the curtains and the quilt on the bed. Now both are happy residents of the studio.


Tuesday, August 23, 2011

Curtains Life Two


My pet peeves are those awful metal bedframes. The legs are not pretty. You can hide them with a bedskirt, but that leads me to another pet peeve - beds are hard to make with them and they look too foo-foo, and they collect dust. Maybe that is why another name for a bedskirt is dust ruffle. Anyway, I put a twin bed up in the studio and I like how it looks and it is a great place for a quick little nap. I am using the red and turquoise quilt that used to be on our bed, but you could see those metal legs. So, I took the stripe curtains that used to be in the guest bedroom, cut away the linings, sewed them together and made a fitted cover for the box spring and frame. I know, very close to a dust ruffle, but no ruffle, and fitted enough that making the bed should be okay. On another note, I am at our condo for a day or two and cannot locate the camera battery! Plus, my IPhone pics are still bad. jerilynn

Sunday, August 21, 2011

Twinkle Lights


Another bad picture....can you hang in there until I get my camera up and running again? So, you are asking....what is it that I am supposed to admire??? The lights are antique blue mason jars that we outfitted with lights. Behind them you can see the closet that Carl finished - still waiting on the doors. The lights look adorable. I hope to get some good pictures soon, or learn how to take better ones with the phone!! Jerilynn

Friday, August 19, 2011

Got Notes?


First image: A cork board that my sister left in my trunk. She said I could either take it back (receipt provided) or keep it. Well, it didn't look all that groovy. But, I had been wanting a cork board in the studio and had recently found some thumbtacks that I made a million years ago by gluing white buttons onto a simple tack. So, I brought the ugly board up here and wrapped some interesting fabric around the board - black with white thread images. I simply thumb tacked the fabric in place in case I wanted to change out the fabric for a different one or maybe even use the black fabric for a project. White button thumbtacks look great on it. Now I need some inspired notes or words to tack to it. A simple grocery list would not do. Jerilynn


Thursday, August 18, 2011

Coaster Through the Day


Experimented a bit tonight with the covered clothesline and made this quick little coaster. The fabrics I used are some of my new most favorite...Hometown by Sweetwater. Love the colors and the variety of prints in the collection. You can't see it in this awful picture (my camera's battery dies and the back-up is back home...used my camera to get this shot), but the white fabric next to the red middle has all kinds of hometown names written on it. Strangely enough, as I am sewing along, Chippewa Falls, my hometown, appeared right on the part of the fabric that was going to show. Had no idea that it was there. Spooky. I think the coaster turned out good. I have a couple more clothesline ideas. I am tired tonight, though, so I think they will keep until the morning. Jerilynn P.S. I made a few more of the improv coasters today. Once I get a bunch made, I will let you know, just in case you want to buy some....:)

Wednesday, August 17, 2011

Wisconsin Cottage Furniture Again

Maine Cottage Furniture is back! I spoke about this company that made painted furniture I loved to drool over last spring. They closed their doors abruptly and left many people without their orders. I was sad for those people and sad for me - I always got good ideas for Carl to interpret at a fraction of the cost. Well, Russell and McKenna bought their name and designs for furniture and fabric. Russell and McKenna also has great whimsical painted items so it was a good fit. I got an email that the website for Maine Cottage is up and running and I was happy to see some of the fabrics that I loved were back, also. I checked under vanities and there it was - the vanity that inspired the ones Carl made for our master bath and for the hall guest bath. Ours aren't painted yet, because I am undecided on colors...but, I selected rhubarb as a color choice on the website and this is what came up. I like it. Our countertop is black, but I think it will look good. Maybe tomorrow I will start the painting...Jerilynn


Tuesday, August 16, 2011

Deck...Love It!


Deck is finished that runs from the garage apron to the side door. Stairs head down on the other side toward the lake. They will eventually tie into a patio/deck off the front of the cabin where the wonderful Happy Hours take place. Carl disassembled the porch that was on the back of the cabin before the addition. He carefully stored the boards, added more to them...viola! A wonderful deck. I swear. That guy can do anything!!! Jerilynn

Monday, August 15, 2011

A Fine Mess of Fabric Strips

I believe I have written previously about my grandma's homemade egg noodles. Lots of egg yolks, salt, flour, and a little oil. Roll out very flat, roll up and cut into thin strips. Shake out and lay on a clean dish towel to dry. She would stand back, survey the pile of towel noodles and proclaim them "a good mess of noodles". Over the years I have used "mess" to describe a fine bunch of things, and smile at the memories that phrase brings. I have been sewing many improvisational projects. Mostly using solids with a few dots and stripes thrown in. Today I decided to go through my fabrics and cut off strips so that I would have a ready supply of fabrics to use. Like rolled noodles, several of the cut strips had to be shaken out before I added them to the pile. I fluffed up all the color, stepped back and decided I had made a fine mess, indeed. Jerilynn P.S. I am storing the strips in a plastic zipped bag that originally held a new blanket. Great project bag.


Sunday, August 14, 2011

I Am Now a Real Quilter


It seems as if every "real" quilter has a design wall. I read a lot of quilting and sewing blogs and they always seem to casually mention "using the design wall to check color, placement, scale, etc." We were at Menards the other day, making our usual deposit of cash, and I steered Carl to the insulation isle. There we selected a fine piece of foam stuff and crammed it into the Honda for the trek back to the cabin. Carl screwed it to the wall with four screws and four washers. Presto. A design wall. I didn't cover it with flannel, I just stuck the blocks up there with pins. Seems to work okay. I guess if I want to make a big quilt I will have to stare at half of it at a time on the wall. I hope it is symmetrical and I can save that second pinning and staring. Jerilynn

Saturday, August 13, 2011

Hot Pads


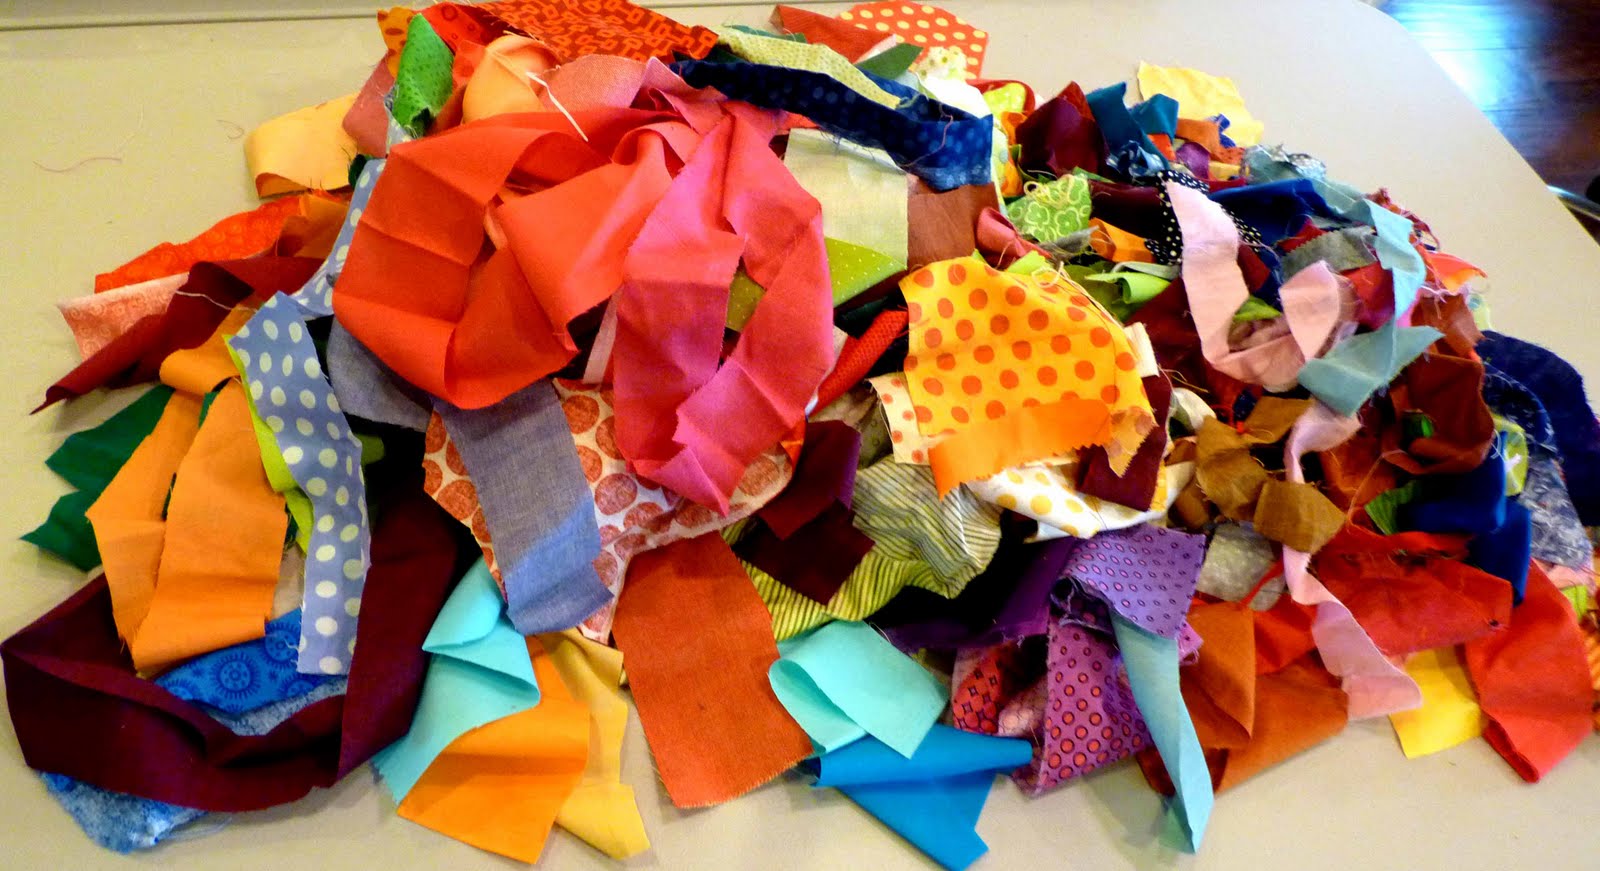
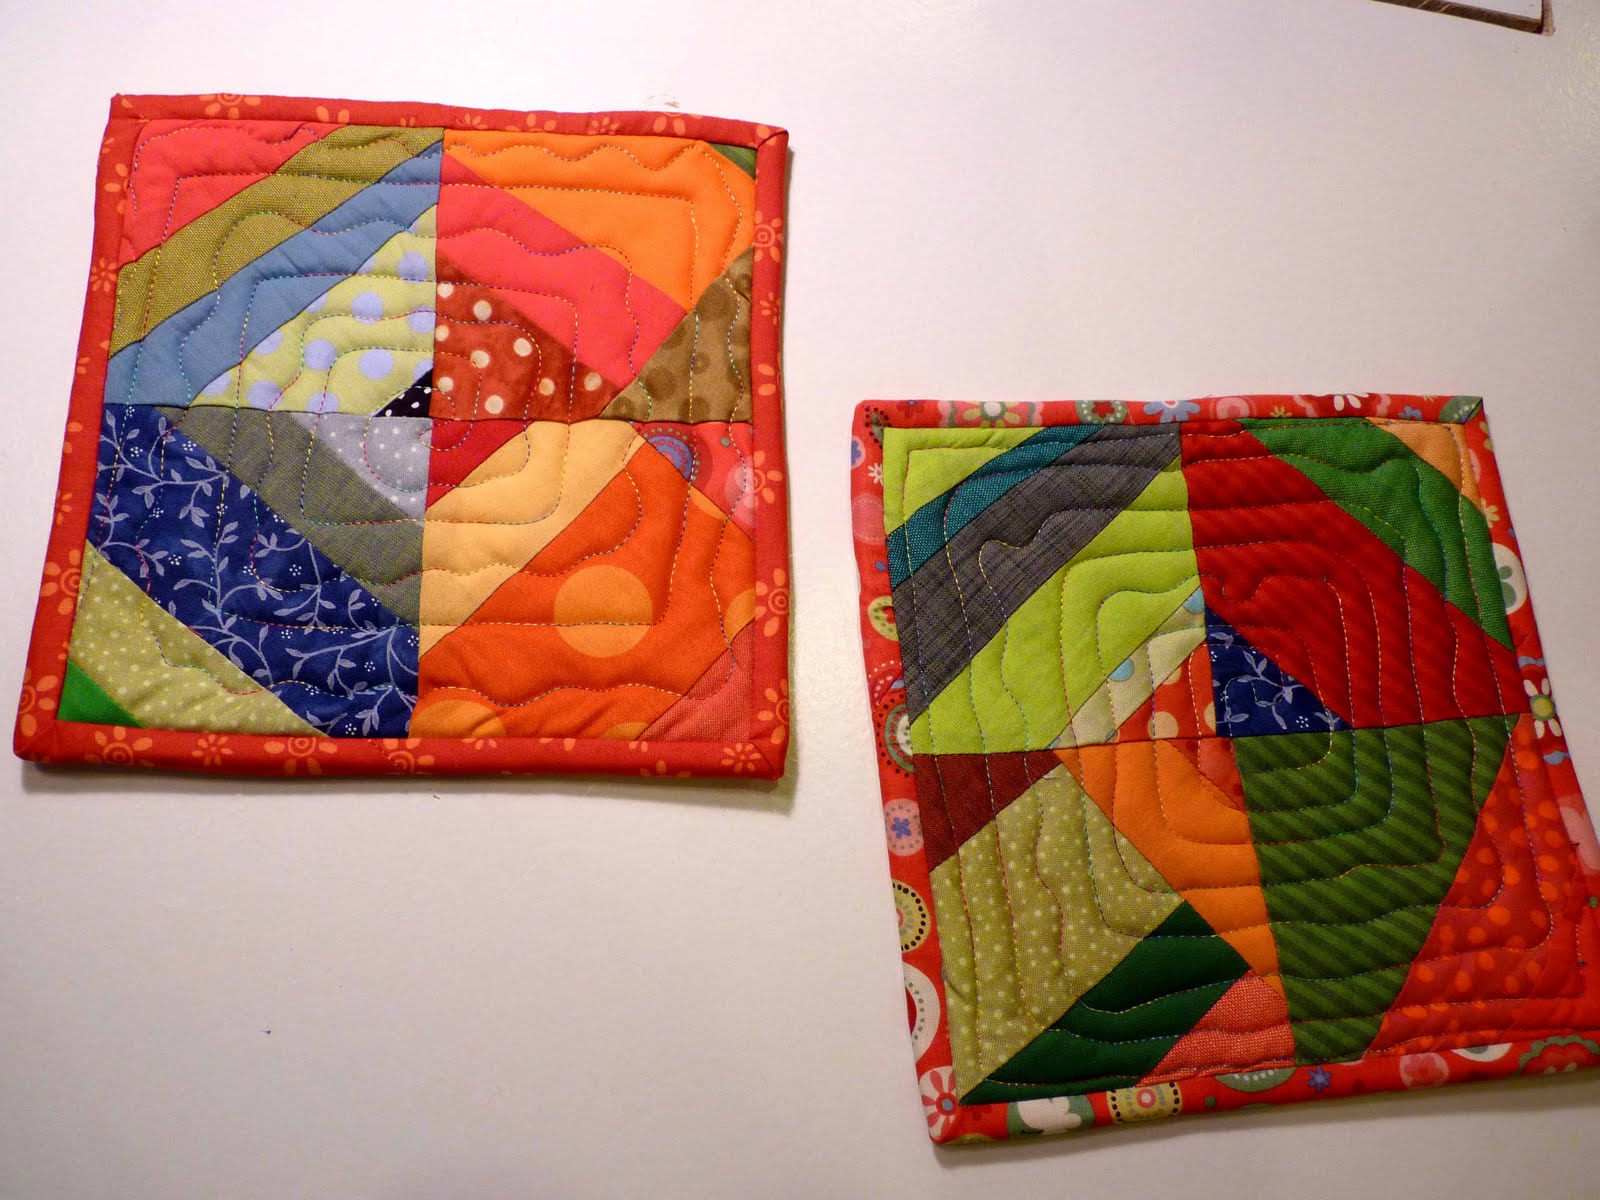
Yet ANOTHER project from Malka Dubrawsky's book, Fresh Quilting. This, again, is the book I made the improvisationally pieced quilt from, the fun coasters (Wynne, I am working on some for you - thanks for the comments!), the sewing machine cover, and now, the Strings Attached potholders. They are also improvisationally pieced, and even their edges are not quite square (on purpose.) An attached loop is folded up on the back should I choose to hang them up. I used bits and pieces of oddly cut fabrics, sticking mostly to solids and dots with a few other prints thrown in here and there. The book has excellent instructions and good encouragement just to "go for it" with inexact measurements. Very freeing. I layered the pieced potholder top with one layer of Insulbrite, a heat-resistant batting and one layer of 100% cotton batting, per package instructions. The cotton batting helps with moisture control, I think. I did some free motion quilting with variegated thread, slapped on my new favorite single fold binding, and done! Another tempting book project is a trivet which is basically 6 potholders sewn together. It would be a great table topper that could take a hot casserole with style. On a happy and sad note, I took my daughter who is starting to love sewing and quilting to one of my favorite vintage/quilt shops, St. Croix County Dry Goods, in Hudson, WI. We walked in to find all fabric 20% off...good news! Nope, bad news. They are closing the store, moving to another location at some point, but...without the fabric. Just the vintage things, trims, buttons, maybe a few vintage fabrics and wools. So sad to hear of this. I guess it is a rent raising/internet fabric/economy decision, but, still...very hard to know. The shop will close by the end of this month. Increasing discounts each week. I know the new place, whever it is, will be great to visit. I will miss the fabric and the wonderful quilts. The owner was a close friend of two of my sewing friends who are no longer with us - gone too soon. Hug your sewing friends and support your local shops. Before they are gone. Jerilynn

Friday, August 12, 2011

New Purchase!

Are you surprised that I had to order a new cutting board?!!!


- Posted using BlogPress from my iPad


Tuesday, August 9, 2011

Round Mugs, Round Coasters

These are from the book by Malka Dubrawsky. I made the wonky square quilt from that book and the sewing machine cover. These round, pieced coasters are a departure from my woolfelt square coasters, but I love the casual piecing and the free-form quilting. They are right at home in the new studio. I demonstrated the piecing and quilting at the Sew Club at Sew Complete a week ago. I decided to finish the three coasters that were demo samples. Glad I did. Bindings cut on the bias fit around the circle quite neatly. Can't see from the picture, but I sewed the binding down using a wavy stitch with variegated thread. So, now my morning coffee in the studio will have a good coaster. I can even invite three friends. Are you free next week? Jerilynn


Monday, August 8, 2011

Build It and They Will Come

Whew! We added on to our cabin so that we would have lots more room for family and friends. Lots more beds, bathrooms, places to sew. Well, I think we successfully accomplished our goals! Non-stop family and friends have come to see the new spaces and most all announce that they are not going to ever leave! We always say they can stay as long as they want, but there have been some quick turn-arounds for beds these past few weeks. Am I saying that I am tired of so much company? Am I saying that I wish we never started this project? Absolutely not!!! I love having people come and feel so at home that they send out change of address cards. I love seeing all the tables set up in the studio and people sewing and cutting with room to spare. I love having youngest son stay overnight in the bed by the windows in the studio and announce he understands why we love this place so much. Even though that means expert babysitters are an hour away rather than 10 minutes away. It was a bit too quiet around here today. Towels are done, sheets are clean and on the beds. Floors vacuumed and dusted. I started making my shower curtain for our bathroom finally, and found out that the grommets I bought to put at the top will not flatten - even when hammered by Carl with a sledge hammer! Back to the drawing board. Jerilynn


Thursday, August 4, 2011

Soft and Stable Wine Bag Tutorial

These wine bags are great to make with fun fabrics and Soft and Stable. Here is a quick tutorial to whip one of these up for your next hostess gift.


Cut an outer fabric and a lining fabric 17" x 12.5". Cut a piece of Soft and Stable byAnnie 16.25" x 11.75".


Sew front to lining at top using a 1/4" seam allowance.


Press seam open and then fold lining to the inside and press well.


Open up and fold in half lengthwise, right sides together. Sew across bag front bottom, up the sides, across the top seam and down the sides of the lining. Leave the bottom lining open for turning.


The bottom of the lining has also been left open to stuff the Soft and Stable inside. Work in place so that the Soft and Stable is between the outside fabric and the lining.


Try placing the Soft and Stable around the wrong side of the outside fabric and pull the lining over it.


Wiggle in place and smooth.


Once the Soft and Stable is in place, fold under the raw edges of the lining and machine stitch closed.


Turn right side out and follow the instructions on the package of the big grommets on how to mark and snap the big grommets in place.


All done! They don't take long to make.....love using fun fabrics!!! Let me know if you have questions. Jerilynn


Wednesday, August 3, 2011

A Quilt for Mom


My mom has entered a nursing care facility, and, while the people working there are so very nice and kind, my mom's bed is small and a bit dreary-looking. I decided to make her a cheery quilt, and the Dresden Plate pattern came to mind. Not sure why, but the little flower circles are fun to make in assorted scraps. I figure I need 24 of them to make the quilt. Not sure what type of background I am going to use, but I think it will look best on just a muslin. Let the perky colors and the quilting be the stars. I have 10 done - a red one is currently attached to a printed background that just didn't look right. I will spend some "unsewing" time tomorrow, or just make a new red block - that might be easier and faster! I am using some rotary cutting template I bought years ago - "Quick Strip" by Sharlene Jorgenson. The cutting goes fast and the stitching is simple. 14 more to go. I will stitch them on the background squares with a clear, poly thread using a narrow hem stitch. A circle of fabric is then stitched in the middle. I think Sharlene gives a hint in her pattern booklet for making the circles. I hope so. Jerilynn